

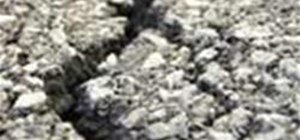
Weather - there's no escaping it! Mother Nature can be hard on asphalt: if you live in an area where there are extreme weather changes from season to season then your asphalt will eventually become damaged. As the ground freezes and thaws there is movement that flexes the asphalt. Repeated flexing can cause weakness to occur. In many cases the first damage you will see will be cracks forming in your asphalt driveway.
It is best to repair these cracks as soon as you see them.
In addition to weather, the next most common issue is lack of maintenance. See, a lot of people think their driveway is like their porch - build it and it lasts forever. But that's not true. Left unsealed, your driveway is vulnerable to problems caused by ice and water seeping into its foundation.
Sure, other things can cause damage to your asphalt: tree roots growing under your pavement can push up and cause cracks. But in our experience, that isn't nearly as frequent as weather and maintenance-related problems.
Warnings
However, if you first notice them in the winter you will have to wait until at least spring before repairing them. You need the outside temperature to be at least 60 degrees Fahrenheit to allow the crack filler to cure, and you need a period of no rain for several days before you can apply a permanent fix for cracking.
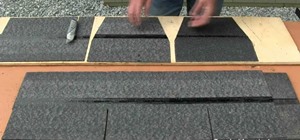
Step 1 Repairing cracks in asphalt driveways
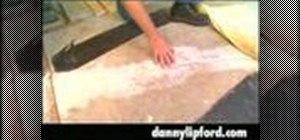
Before you fill the cracks it is important to clean them out first. A wire brush with stiff bristles is recommended for this. You need to make sure that all loose particles of the asphalt are removed from the crack. If any plants have begun to grow through the asphalt you need to remove them and get as much of the root system as you can out. The roots will continue to grow if not removed and can lead to further damage.
It's also an excellent idea to apply degreaser to any stains on your asphalt before you apply any crack filler. Cleaning the stains helps the filler to adhere better, meaning a longer-lasting repair.
Once you have the crack completely cleaned out you have some choices.
- Liquid crack filler: This type of crack filler is recommended for use with very narrow cracks. These would be cracks that have spread less than a quarter inch in width. (Although, even with very narrow cracks it is also possible to use the more solid crack filler.) You can find liquid crack filler online and have it delivered right to your door.
Do a second application 6 months down the road to make sure the crack is filled and sealed completely. If water gets into the cracks it will erode the foundation and create depressions and potholes. It also feeds vegetation in the grass. Taking the time to do the second application means your asphalt will stay sealed longer.
- Solid hot pour crack filler: This is a thicker material for filling cracks that have spread more than a quarter inch in width. It's extremely important that you use professional equipment if you are going to go this route, since the hot pour crack filler needs to be heated to 400°F to achieve the proper consistency. Because of this, we recommend homeowners buy the liquid pour crack fill unless they have very large driveways. If you do have a large driveway, a commercial property, or perhaps a neighborhood or condo association that can make use of it, a 10-Gallon Melter Applicator allows you to melt and apply hot pour crack filler at walking speed. Hot pour crack fill can be applied at any temperature.
Once you have chosen the material you wish to use to fill the crack in your asphalt and you have cleaned out the crack, you need to check and see how deep the crack is. If you catch the crack early enough it is likely to be a shallow crack. However, if the crack has been there for some time grooves in the base material under the asphalt could have occurred.
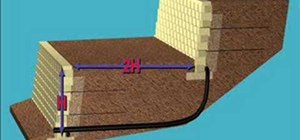
Step 2 Determine Crack Depth
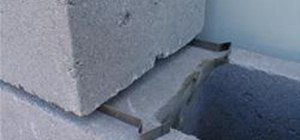
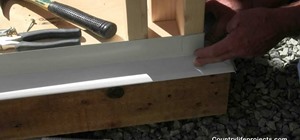
- Shallow crack: If you find that it is a shallow crack then you can go ahead and fill it after making sure that it is cleaned out. To do this you simply pour the liquid crack filler along the crack. Be sure to keep the filler inside the crack. After you have filled the crack to the surface, go over it with a squeegee or soft broom to even it out. If you have chosen to use the more solid material to fill the crack with you may have to use a trowel or a square nosed shovel to remove excess filler.
- Deep crack: If the crack is deeper than a half inch you need to fill it with coarse sand after cleaning it. Fill with the sand until the crack is a half inch from the surface of your driveway. The sand is used to replace the foundation that was washed away by water. Once you have the crack evenly filled to within a half inch of the surface apply the crack filler and smooth it out with a squeegee or soft broom. If you have chosen to use the solid material to fill the crack you will have to use the side of a trowel or a square nosed shovel to remove excess filler.
Tips
- Allow the crack filler to cure for 24 to 48 hours and then go over the crack line with sealcoat. This will keep the crack from reappearing and help to blend the repair into the rest of the driveway.
Quick Summary
So the steps you need to follow are:
- Clean the crack completely
- Fill if necessary with sand
- Apply the crack filler of your choice
- Let it cure
- Sealcoat it
Just updated your iPhone? You'll find new emoji, enhanced security, podcast transcripts, Apple Cash virtual numbers, and other useful features. There are even new additions hidden within Safari. Find out what's new and changed on your iPhone with the iOS 17.4 update.


1 Comment
I remember this happening all the time after an ice storm in Texas. You have some great tips on asphalt repair, although I'm not sure I would have the smarts to do something like this. Maybe I'll get my husband to try doing it ;)
Share Your Thoughts